Direct Deposit Instructions - Detailed
Direct Deposit Setup in Paycom
- Are you a new employee or is this your 1st time setting up a direct deposit with Right at School? Follow instructions on this page in the Right at School Wiki - CLICK HERE
- For best results, we recommend using the Paycom App
- Are you trying to change your existing direct deposit information? Follow the instructions below. Instructions differ for the computer & the Paycom app, so we’ve included both
Desktop/Computer Instructions
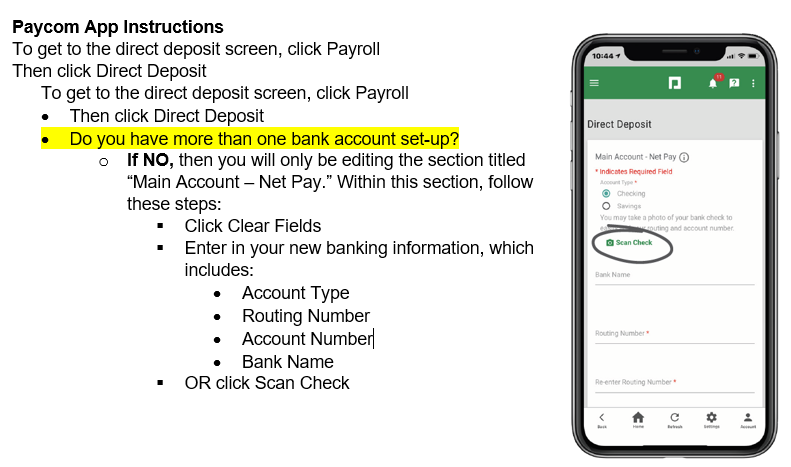
To get to the direct deposit screen, click Payroll
- Then click Direct Deposit
- Do you have more than one bank account set-up?
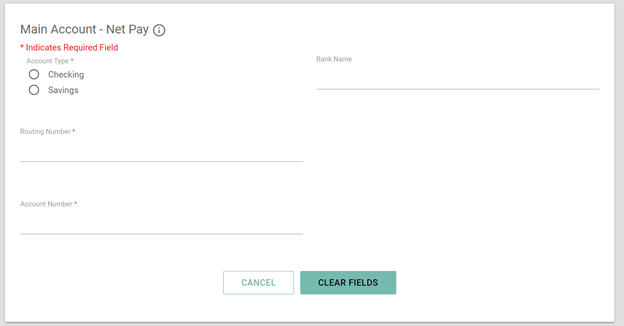
- If NO, then you will only be editing the section titled “Main Account – Net Pay.”

- Within this section, follow these steps:
- Click Clear Fields
- Enter in your new banking information, which includes:
- Account Type
- Routing Number
- Account Number
- Bank Name
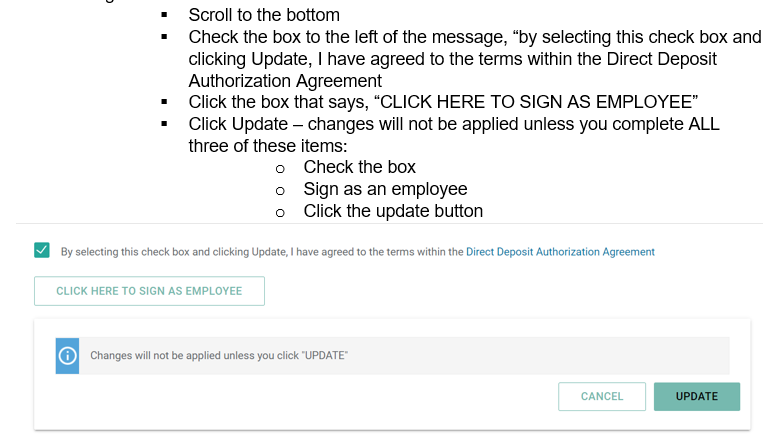
- Scroll to the bottom
- Check the box to the left of the message, “by selecting this check box and clicking Update, I have agreed to the terms within the Direct Deposit Authorization Agreement
- Click the box that says, “CLICK HERE TO SIGN AS EMPLOYEE”
- Click Update – changes will not be applied unless you complete ALL three of these items:
- Check the box
- Sign as an employee
- Click the update button

-
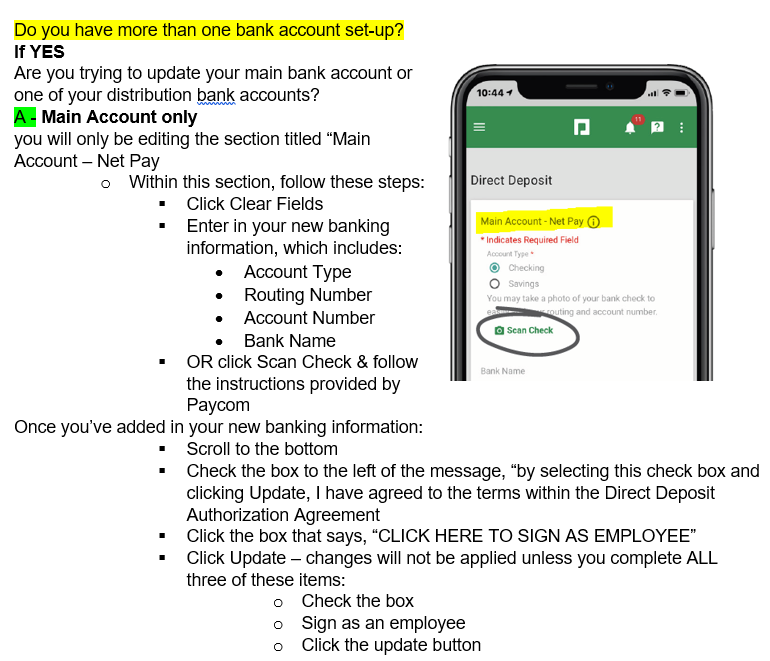
If YES
Are you trying to update your main bank account or one of your distribution bank accounts?
A - Main Account only
you will only be editing the section titled “Main Account – Net Pay
-
- Within this section, follow these steps:
- Click Clear Fields
- Enter in your new banking information, which includes:
- Account Type
- Routing Number
- Account Number
- Bank Name
- Scroll to the bottom
- Check the box to the left of the message, “by selecting this check box and clicking Update, I have agreed to the terms within the Direct Deposit Authorization Agreement
- Click the box that says, “CLICK HERE TO SIGN AS EMPLOYEE”
- Click Update – changes will not be applied unless you complete ALL three of these items:
- Check the box
- Sign as an employee
- Click the update button
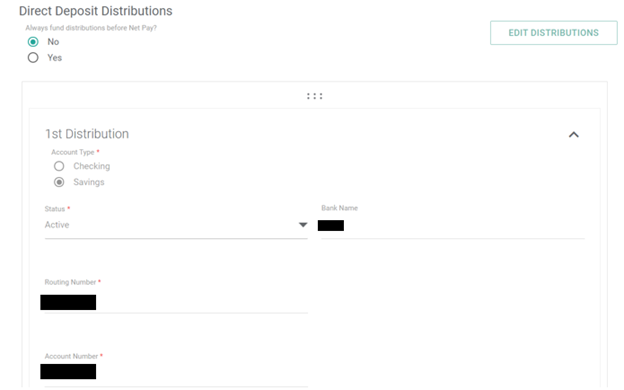
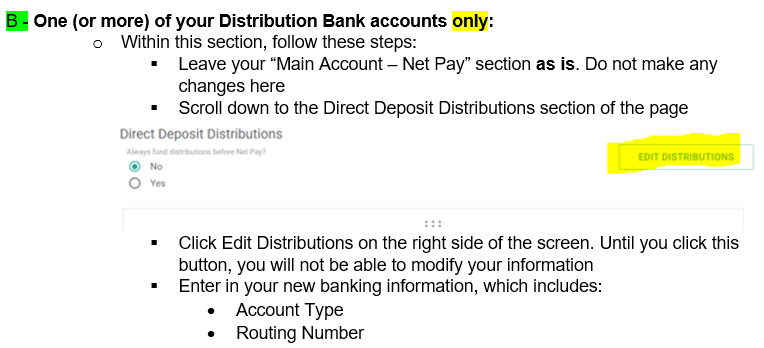
B - One (or more) of your Distribution Bank accounts only:
- Within this section, follow these steps:
- Leave your “Main Account – Net Pay” section as is. Do not make any changes here
- Scroll down to the Direct Deposit Distributions section of the page
-
- Click Edit Distributions on the right side of the screen. Until you click this button, you will not be able to modify your information
- Enter in your new banking information, which includes:
- Account Type
- Routing Number
- Account Number
- Bank Name
- Repeat this process for every distribution account you want to update.
- Once you’ve updated everything you needed to, scroll to the bottom of the page
- Check the box to the left of the message, “by selecting this check box and clicking Update, I have agreed to the terms within the Direct Deposit Authorization Agreement
- Click the box that says, “CLICK HERE TO SIGN AS EMPLOYEE”
- Click Update – changes will not be applied unless you complete ALL three of these items:
- Check the box
- Sign as an employee
- Click the update button
C - Both your Main Account AND your distribution bank accounts
- Follow the instructions in sections A and B, which are highlighted in green
-
-
- Within this section, follow these steps: